 Welcome to the world of Content Management!
Our CMS allows you to add, delete or edit content on existing pages of your site using a very friendly editor.
We'll explore all the features in the sections below. And rest assured, you can always have us make site updates if you don't have time or just don't feel comfortable with certain areas.
Logging In
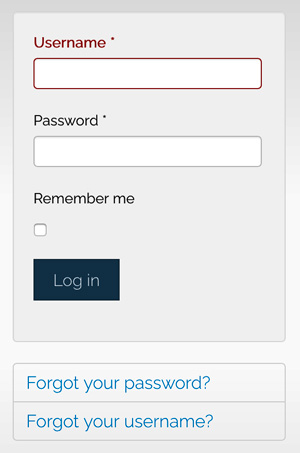 If you elect to have website access granted to anyone in your practice, we'll create a user account for that person. The user will then receive an a-mail from the system giving them their username and password – which we can change or turn off at your request.
We'll add a link to your Home Page titled "Staff Log-in" (or anything else you'd prefer). Once the link is clicked, you'll be taken to the log-in page >
Options are available here to assist users who have forgotten their username or password, if desired.
Once you've successfully logged-in, you'll be taken to the site's home page and can begin editing.
Using the Editor
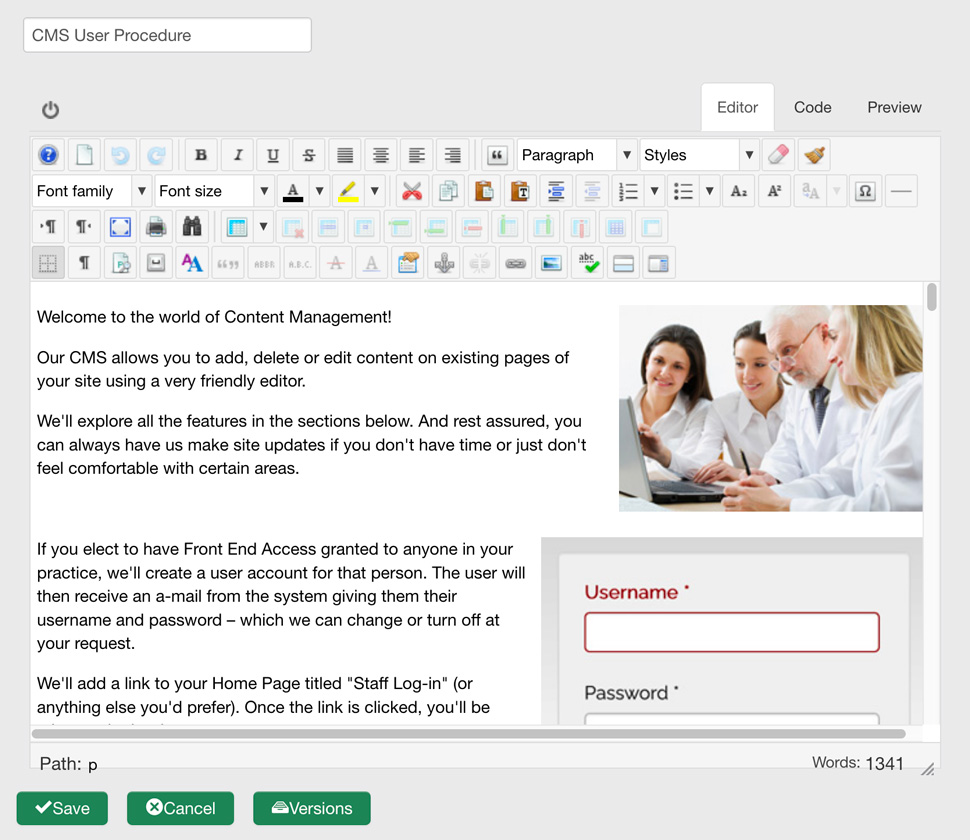
After log-in, go to the page you want to edit. You’ll see the Edit icon ![]() at the top right corner of every article on every page.
at the top right corner of every article on every page.
Clicking on this icon and then the Edit link will open up the editing view for that article (we’re using this page as an example):
Editing Text
You may add, delete or change any text on the page. Once you’ve completed the desired text changes, click the Save button at the bottom left corner of the Editor section and your changes will be saved (click Cancel if you wish to return to the original page). You can then see the updated page – click the Edit icon again if you wish to make additional changes.

Most of the functions in the Editor are very similar to those found in any typical text editor. We’ll take a look at some of the functions you may not be familiar with (a complete description of each function can be found here):
Fonts are determined by the template and website structure - please do not change
Font Size is determined by the template and website structure - please do not change
Font Styles are determined by the template and website structure - please do not change
Format Styles are where you can indicate headlines and subheads. Select the desired line of text and use Heading 2 for the major headline, Heading 3 for subheads and so on. The entire line needs to be selected, not just certain words or phrases in a line.
Cut, Copy, Paste are standard buttons, with the addition of the Paste as Plain Text option. Whenever you want to paste text into an article, select this option first, paste the text there and then Insert. You’ll avoid many formatting issues caused by imported tags.
Bulleted and Numbered Lists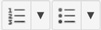 can be applied to full lines of text. Use the Indent
![]() function to increase the indent level on selected lines
function to increase the indent level on selected lines
Insert/Edit Image is where you can add images to your article. Please see Adding Images for details.
Insert/Edit Link creates hyperlinks from selected text. Please see Creating Links for details.
Spellcheck will check the spelling on the article text when clicked.
Adding Images
When preparing an image to add to the page, there are a few things to consider:
- The image should be the final size that it will be on the page. Do not scale the image up or down after it’s been placed.
- The image must be in a “saved for web” format, either in .jpg .gif or .png format, with a file size no larger than 100k.
- Images that are not yours (obtained from other sources) must not be under copyright. If they are, you must have permission and must add a note attributing the image to the copyright holder.
- When you’re through preparing the image file, save it to an appropriate location on your computer.
To place the image on your page, click on the location you’d like it to appear (before the first word in a text block if you want the image to be placed within the text block, or on a blank line of its own if you want it to stand alone).
Then click on the Insert/Edit Image button. You’ll see the Image Manager appear:
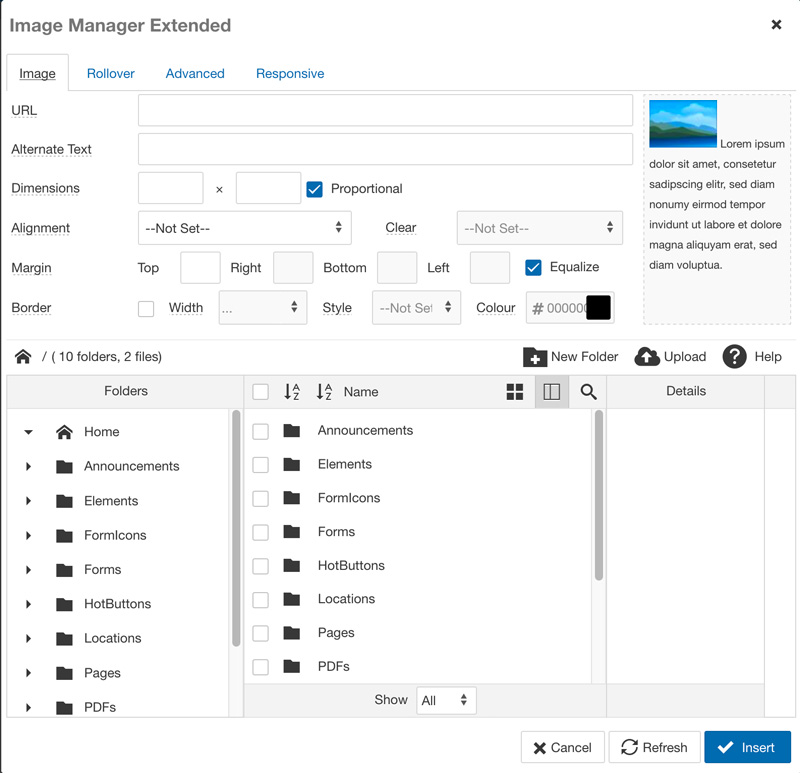
If the image you want to place is already in the website files, you can click on the appropriate folder in the center window, click on the desired image and then click Insert.
If the image is still on your computer and yet to be brought into the site, all you’ll need to do is click on the folder (shown in the center window) that you want to place the image into – or click on the New Folder button if necessary – and then click on the Upload button, You’ll see the Upload window open:
 Drag and drop the desired file onto the Drop files here window.
You won’t need to adjust any of the image options here – you can fine-tune the resizing of the image in the next step.
Click the Upload button to finish.
All that’s left is to place the image where you want it. If the image is intended to stand on its own, it will appear right in the position on the page that you clicked earlier and you’re all through here (you can select Centre in the Alignment dropdown to center it in the page).
If you want to have text run around the image, as long as you previously placed your cursor at the beginning of the desired text block, all you need to do is select Right or Left in the Alignment dropdown and then de-select the Equalize checkbox in the Margin area and enter '10' in the opposite Margin field (Left or Right) from what you selected in Alignment above. This places a margin that holds away the text from the edge of the image.
You can make fine adjustments to the size of the image here – overtype the value in either of the Dimensions fields (the other will change automatically). Once you’ve clicked the Insert button at the bottom right you’ll be able to see the results immediately.
To delete an image that’s already been placed, just select the image and click the Delete key on your keyboard.
Creating Links
Adding a hyperlink to a selection of text or to an image is fairly straightforward. Drag your cursor across the desired text or click on the desired image to select it. The click on the Insert/Edit Link button![]() in the toolbar. The Advanced Link frame will open:
in the toolbar. The Advanced Link frame will open:
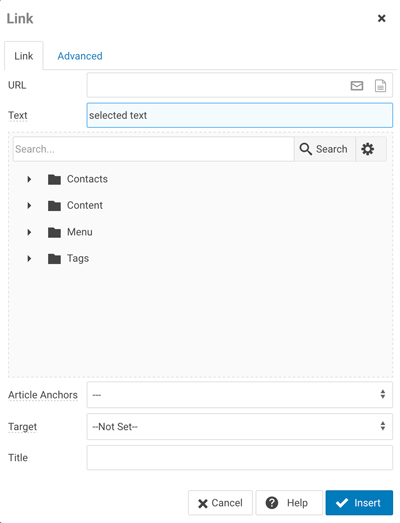 To create a link to an external web page (not part of your website), just place your cursor into the address field of your browser when the desired page is displayed. Copy the entire web address (including the http://) and paste it into the URL field at the top of the Advanced Link frame. If you wish the linked page to open in a new window (keeping your website open in the background), select Open in new window in the Target dropdown. Click on the Insert button at the bottom left and the link will be created.
To create a link to an internal web page, click on the Menu item in the Link Browser frame. Navigate to the desired menu and then click on the page within that menu that you want to link to. Click on the Insert button at the bottom left and the link will be created.